
Kiln Controller:
Executive summary:
I received the following brief: “Can you implement this repo? https://github.com/jbruce12000/kiln-controller/tree/main”. I reviewed the repository, purchased components, deployed the repo to Raspberry Pis, designed/free-wired/tested prototypes, and modified the design according to client requests (namely to add cooling fans, status LEDs, and safety cutout switches. I reduced production times with a custom PCB, opensourced my contribution (https://github.com/GoatNote/kiln-controller), and uploaded a video demonstration to YouTube.
Capabilities and skills:
Prototyping. Testing and validation. PCB design. Linux/Github/SystemD/wireless access-point deployment. Power switching and PID tuning. Enclosure design. Documentation.
Implementation details:
I sourced the components required from Core Electronics and free-wired them together as recommended by the repo.
After messing around with a friend’s hot plate made out of a resistive heating PCB and acquiring MOSFET DC switches, I started my first tests. I found that the hotplate couldn’t actually get hot enough to tune the PID, so switched to some vape wire I had purchased at the same time. Wrapping that in fiber blanket, I made a tiny ‘hot fluff ball’, and learned that you should only poke the tip of the thermocouple into the hot area, not run the cable inside the hot area as well. With that test done, and the niggles of tuning/Linux/webserver/access-point configuration deployment understood, I moved on to the high power switching.
I purchased enclosures and heat sinks, along with SSRs for high power AC switching. I spent time trying to make a fiber optic type guide for the SSR’s status LED, to make clear the state of operation of the machine from a distance/through an opaque enclosure, and finally decided that LEDs off of the Pi’s GPIOs would be the honest solution. That in itself was a nightmare re placing/mounting the LEDs to the box lid, and I solved this in the later run by just embracing a clear lidded enclosure, after finding lovely ones at JayCar.
I went into the python code and after a bit of messing around with scoping issues, added in conditionals that reflected the state of the program by LED status. E.g.: Server running? LED1 = on. Temperature profile running? LED2 = on. SSR firing? LED3 = on. Obviously good to poke around in the python code, and honestly I should have read all the code before starting the project.
I added in an external and non-programatic cut-out on the control signal to the SSR, at the very sensible request of the commissioner. While I was looking at the code and working with the GPIOs, I added status sensing wires that could confirm if an interlock/cut-out switch was operational. I had to program in conditional checks so that the LED status/program status reflected the external/hard-wired safety cut out.
Appreciating that every kiln and furnace would be different, I tried to make the kiln-tuning aspect of the whole system accessable from the web-interface, as a major barrier to user uptake would be learning the whole linux/ssh/systemd/venv/python/nano pipeline would be a nightmare for the user just wanting a simple ‘tune’ button. But I didn’t make much headway, and dropped that thread.
With all of these efforts, and some initial functional boxes made, I reflected that a PCB would go a long way to cleaning up the design. I fabbed the PCB, which was like an extended PI-hat, wired up and tested the revision, and did a proper job of the grommets and mounting plate. I changed the internal configuration around as well, for the sake of visual appearance. Actual vents in the box for thermal management would go a long way, especially for beefy kilns and long runs, an untested use case, as of yet.
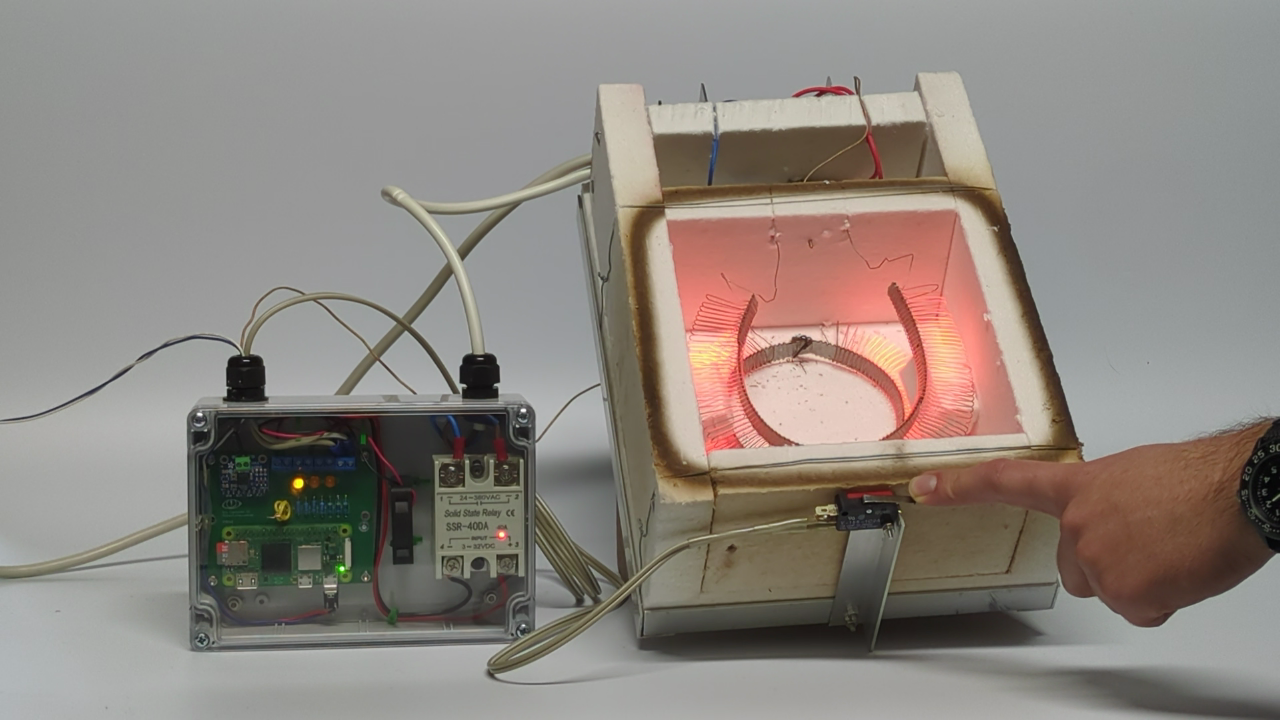
Demonstration Kiln:
I decided to produce an aesthetic kiln for presentation purposes. I found a fan heater with that had signed up as an organ donor, accelerated the end of its life, and acquired a 2kW element for $15. Always nice to use someone else’s economy of scale. I purchased fiber-board from a local supplier, had it sliced to size, had to uh, correct the straightness of some of the cuts (informing the supplier that they might like to invest in some ‘straight edge capability’), and took the chance to do some market research on what their kiln controllers were like. They informed me they had a bullet proof solution already, as is to be expected. I cut and bolted an aluminium frame together, secured cables, and performed wiring with WAGO connectors, which are quite nice, and I will invest in, in the future. I tuned the kiln, noting a bit of smoking from board binder burn out, and decided a nice long firing would be in order, outside, after stinking up a shared space.